


They are perfect. A little rough but this is what they look like fresh out of the molds.
Tomorrow I will clean them up, then rough them up with steel wool to bring out the highlights and then work on the patina, or color to finish them off.
A good days work. Now to clean up the mess.

The resin I am using is Easy-Flo Clear, equal parts of A & B. I mix a brown dye to part B, stir, add 1lb. of Bronze powder, stir until mixed together, add A to it, stir for 30 secs., I then have max two minutes to paint on the first coat and pour in and slush around the balance of the solution before it sets up. I then mix another batch and fill up the balance of the mold.
Each
mold takes 32oz of resin and 2 lbs. of bronze powder. Then I wait for
about 30 mins before I can demold and see if the casting is good. I want
to make sure every minute detail is in the final.

I have only poured the areas of the molds where I have a concern and to make sure the details are all there.
Success.
They do look a bit like ghosts, only partially there and whispy.
After they hardened and I checked them over, it is time to clean up the molds and make sure they are super clean with no clay or resin residue in the folds and cracks. That will take the rest of the day.
I will make the first casts on Monday. Happy weekend.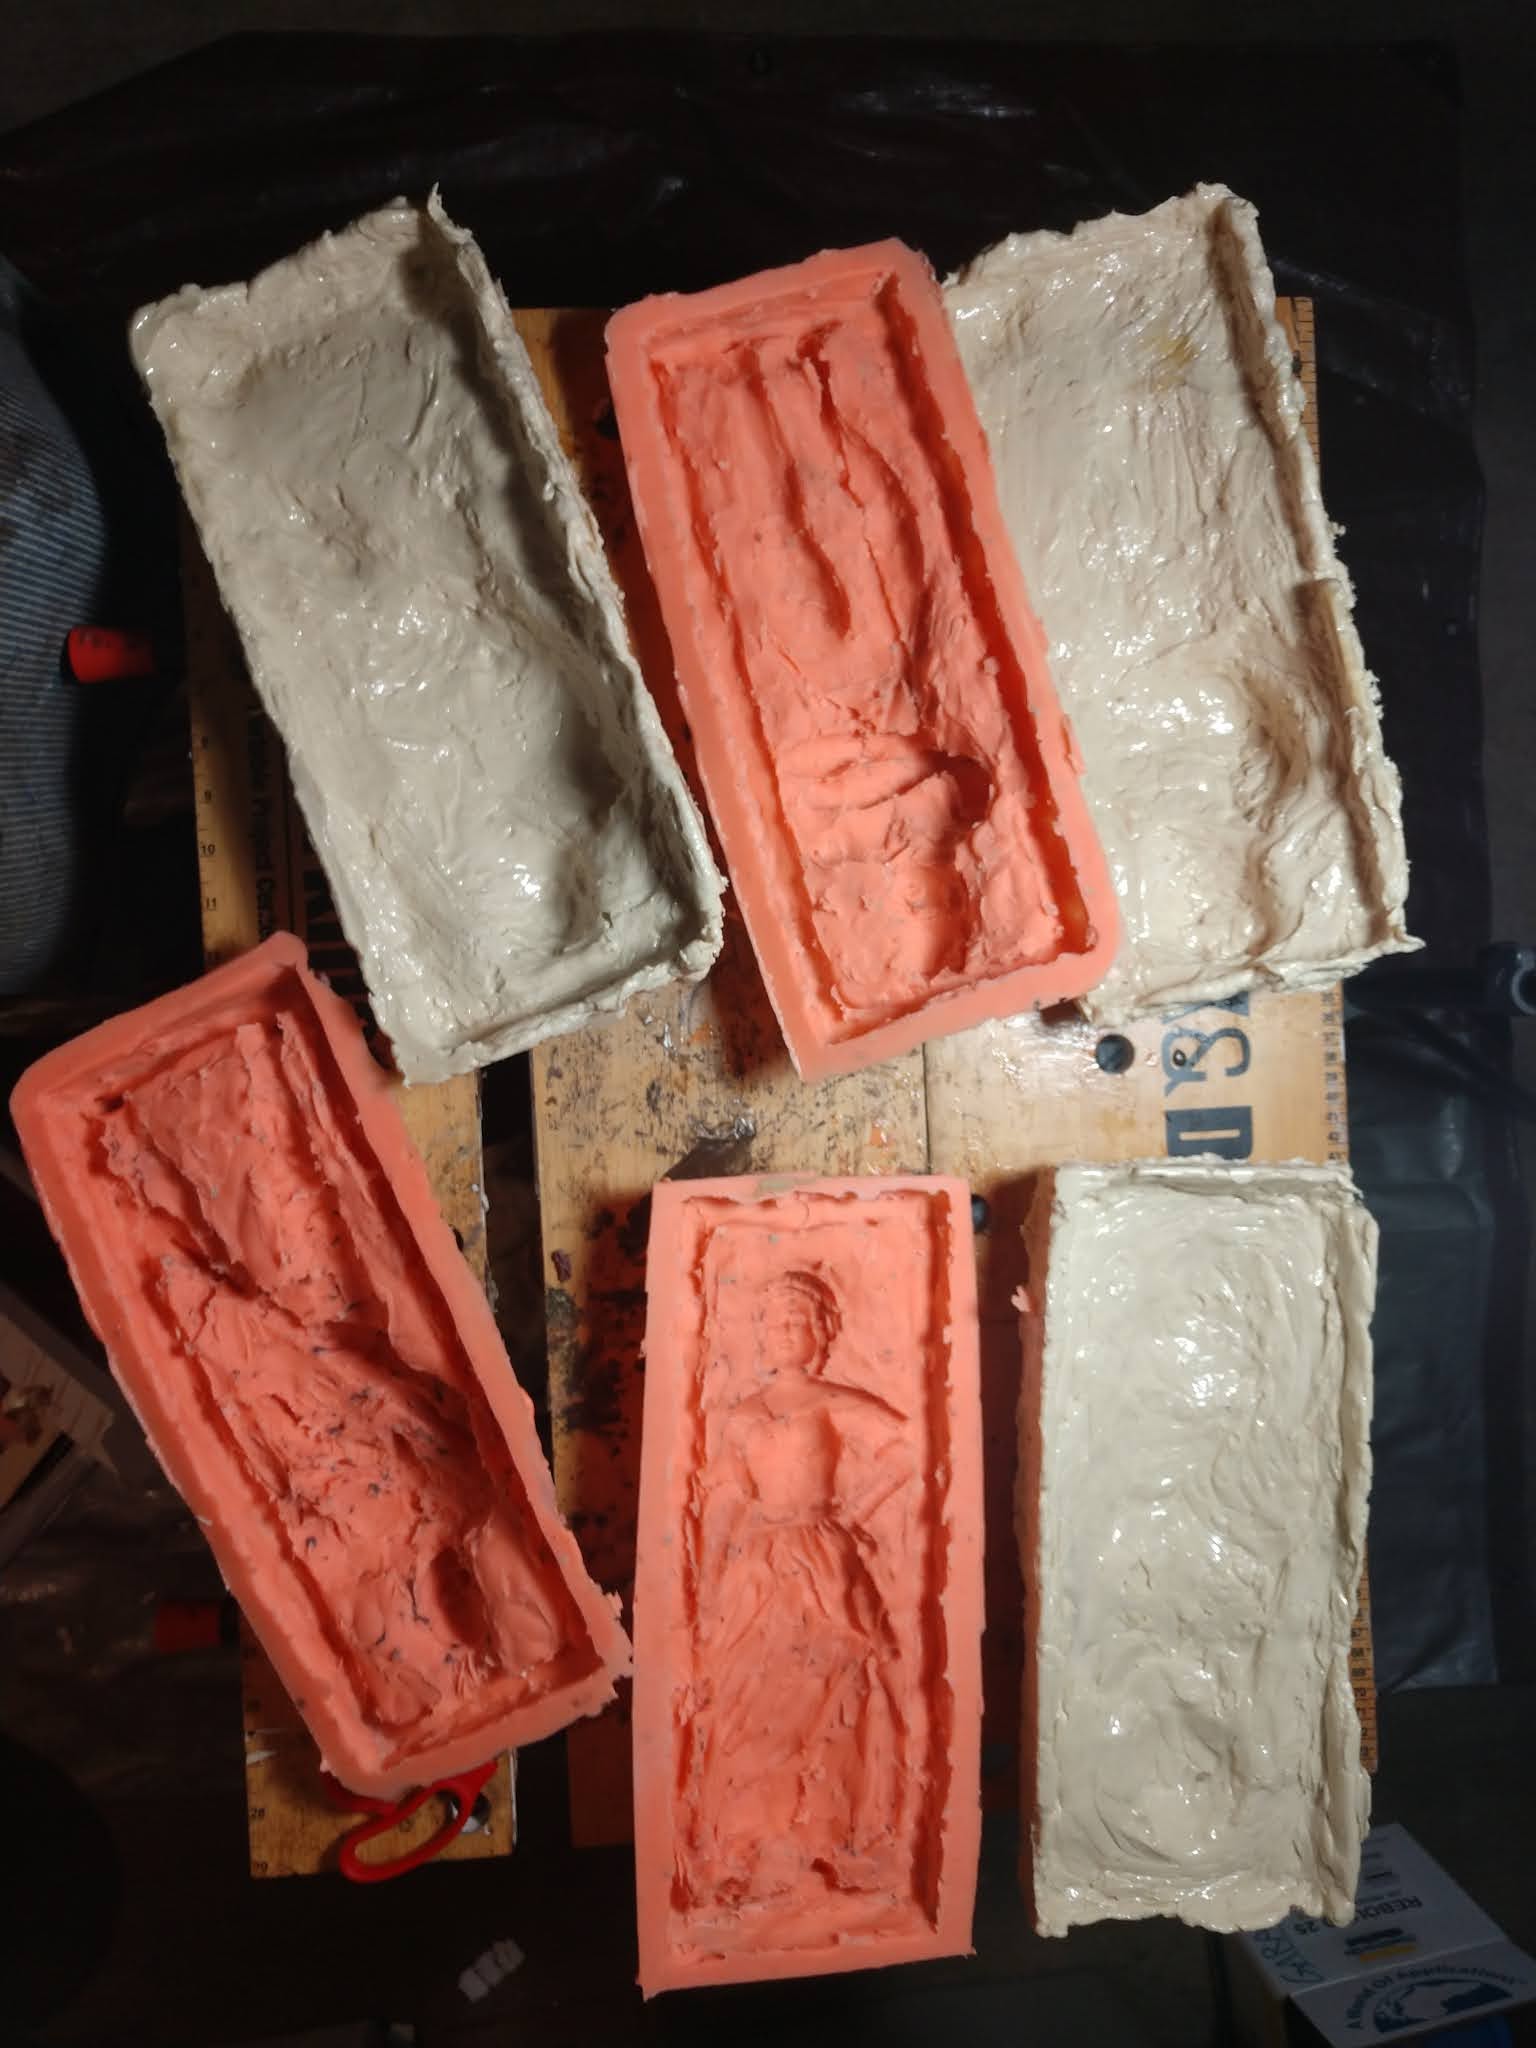
I have one bad mold.
I will spend some time to see if I can save it. Then make another test cast.
If not good, I will have to start over and make the new mold.


Now I start the rubber mold making.
First I mix the two mold chemicals together in equal parts, and I now have 8-10 mins to paint it on the clay original before it becomes too thick.

This
is the first coat of six. It is important to smear the rubber over the
entire surface and with the brush ... scrub it over every surface, and
into every crack and crevice. This first coat picks up every little
mark, and in my case fingerprints. This sets the surface texture of the
final casting.
If this
coat does not set correctly, I will have to start over but I wont know
until the entire mold is done, the ceramic shell is made and I cast my
test piece.
Now I wait 90 mins. and add the second coat, wait 90 mins. next coat, etc. until all six coats are done.
I am doing a single piece first just to get the timing correct with the mixing and coating times, as it is all according to room temp. and humidity.
Note to other sculptors
No
one told me when I was in high school that I should pay more attention
in chemistry and geometry and physics classes because as a sculptor I
would need to know what chemicals to mix for the molds, castings ...
what chemicals to use and in what amount for color patinas and timing of
the coats ... how much clay, metal and foam I will need for a piece
based on size and shape ... for large sculptures indoors weight of the
piece based on lbs./cu foot of the materials bronze vs. marble vs.
granite... and the load limit of the floors it is sitting on ...
outdoors I need to be aware of temperature extremes to determine which
patina chemicals to use ... wind directions and speeds in a normal year
for how much torque the sculpture will take and where and how many holes
I need to have for the wind to go through ... if in a rainy and snowy
environment I can't have areas where the water or snow will collect but
will run off...
First step in making the molds is actually reworking the original clay pieces, filling in all of the holes and cleaning up the undercuts. All of which makes it easier to cast the final piece. This part of it took me almost 3 days, but it will save me a lot of time and trouble later.
 Next
I make a box around the pieces to hold the rubber mold and the plaster
shell. I am dealing with liquids, which means of there is a hole in my
box, the mold materials will leak. Not a pretty site, very messy and a
lot of work to clean up.
Next
I make a box around the pieces to hold the rubber mold and the plaster
shell. I am dealing with liquids, which means of there is a hole in my
box, the mold materials will leak. Not a pretty site, very messy and a
lot of work to clean up.
The
mold material is plastic when it dries, so I can use cardboard as my
box as the plastic will not stick. Below are the chemicals I use to make
the rubber molds (top row), the plaster shell (boxes) and the bronze
cold castings (the jugs). Each is a combination of  mixing two chemicals together. Temp. and humidity is critical +- 5degrees.
I
had to postpone my first round of making molds because the smoke from
the forest fires around us made it impossible for me to open the windows
for ventilation. So today I can work. 
As a fine artist telling people the “back story” of a painting or sculpture is as enjoyable as creating the work. It enables me to share my thought processes, research and maybe even a bit of my soul. People may not agree with my end product but by telling the story of the piece they come away more knowledgeable and less intimidated.
The Woman Patriot


First was the question of what type of woman was she?
She was the woman left behind as her husband went to war; to raise the family, work the farm, run the store, teach children, be the politician at social events, work in the shops, be the lady of the house, make the decisions to keep a roof over her family’s head and food on the table. She was capable, hardworking and proud.
How did she participate in the war effort?
She participated by boycotting British goods, producing goods for soldiers, spying on the British, and serving in the armed forces disguised as men, served on the battlefield as nurses, water bearers, cooks, launderers and saboteurs.
What did she wear in the 1770’s?
I looked at paintings, read journals and books on the fashions of the time from 1770-1790. She dressed depending on her station in life. They all wore the same basic articles of clothing, but it was about the quality, fashion, and materials. Her gown could have been wool or cotton or silk, and her undergarments were linen.
The question was who was the Woman Patriot in my mind?
I had the image of a woman who was not the farm girl, but slightly better dressed and who could be a camp follower and yet pass herself off as a educated lady when it became necessary. Not a socialite but working class like a teacher or shop keeper.
She is wearing a typical fitted long full dress and an over skirt with a tight waist, 3/4 length sleeves and a shawl over her shoulders. Her cap is a cloth cap that covers the top of her head and ties so that the edges scallop. In her left hand she carries a basket of vegetables or flowers.
Through my research, I found a lady that was the persona I wanted.
Mercy Otis Warren. An avid patriot, Warren began writing political dramas that denounced British policies. Her 1772 satire, “The Adulator", criticized the British colonial governor’s policies a full four years before Jefferson wrote the Declaration of Independence. Warren also published two additional plays skewering British colonial leaders, Defeat (1773) and The Group (1775.) She supported the Boston Tea Party, boycotts of British imports and urged other women to follow suit.
This then is the back story of the Woman Patriot and why I have created her as I did.
The Black soldier of the 1st Rhode Island Regiment.

 African Americans were no
longer recruited. Slowly the entire regiment became fully integrated.
African Americans were no
longer recruited. Slowly the entire regiment became fully integrated.
The Oneida Warrior


The Oneida Indian Nation – America’s First Allies
The Oneida Indian Nation’s legacy of supporting the United States military dates back to the Revolutionary War, when Oneidas fought alongside the colonists in the battle against the British. Having fought valiantly in several key battles of the American War for Independence including the battles of Oriskany, and Saratoga, the Oneida Indian Nation, the only member of the Six Nation Haudenosaunee Confederacy to side with the Americans, became known as the United State’s first allies.
Since the American Revolution, Oneidas have fought in every American military conflict, memorializing their longstanding support, friendship and reverence for the United States and the values it holds.